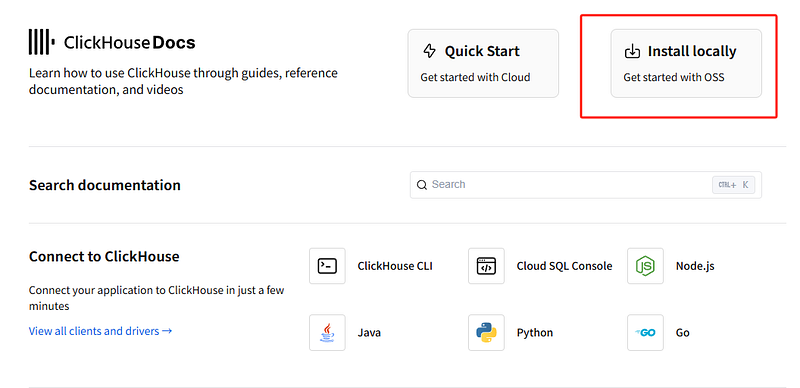
Get set up quickly with ClickHouse. Download an appropriate binary for your OS
Overview
Overview
Get set up quickly with ClickHouse. Download an appropriate binary for your OS, learn to run ClickHouse server, and create a table, insert data into it, and query your table using ClickHouse client.
Prerequisites
You’ll need curl or another command-line HTTP client to fetch the ClickHouse binary.
Download the binary
ClickHouse runs natively on Linux, FreeBSD and macOS, and runs on Windows via the WSL. The simplest way to download ClickHouse locally is to run the following curl command. It determines if your operating system is supported, then downloads an appropriate ClickHouse binary.
note
We recommend running the command below from a new and empty subdirectory as some configuration files will be created in the directory the binary is located in the first time ClickHouse server is run.
curl https://clickhouse.com/ | sh
You should see:
Successfully downloaded the ClickHouse binary, you can run it as:
    ./clickhouse
You can also install it:
sudo ./clickhouse install
At this stage, you can ignore the prompt to run the install command.
note
For Mac users: If you are getting errors that the developer of the binary cannot be verified, please see “Fix the Developer Verification Error in MacOS”.
Start the server
Run the following command to start the ClickHouse server:
./clickhouse serverYou should see the terminal fill up with logging. This is expected. In ClickHouse the default logging level is set to trace rather than warning.
Start the client
Use clickhouse-client to connect to your ClickHouse service. Open a new terminal, change directories to where your clickhouse binary is saved, and run the following command:
./clickhouse clientYou should see a smiling face as it connects to your service running on localhost:
my-host :)Create a table
Use CREATE TABLE to define a new table. Typical SQL DDL commands work in ClickHouse with one addition - tables in ClickHouse require an ENGINE clause. Use MergeTree to take advantage of the performance benefits of ClickHouse:
CREATE TABLE my_first_table
(
    user_id UInt32,
    message String,
    timestamp DateTime,
    metric Float32
)
ENGINE = MergeTree
PRIMARY KEY (user_id, timestamp)
Insert data
You can use the familiar INSERT INTO TABLE command with ClickHouse, but it is important to understand that each insert into a MergeTree table causes what we call a part in ClickHouse to be created in storage. These parts later get merged in the background by ClickHouse.
In ClickHouse, we try to bulk insert lots of rows at a time (tens of thousands or even millions at once) to minimize the number of parts that need to get merged in the background process.
In this guide, we won’t worry about that just yet. Run the following command to insert a few rows of data into your table:
INSERT INTO my_first_table (user_id, message, timestamp, metric) VALUES
    (101, 'Hello, ClickHouse!',                                 now(),       -1.0    ),
    (102, 'Insert a lot of rows per batch',                     yesterday(), 1.41421 ),
    (102, 'Sort your data based on your commonly-used queries', today(),     2.718   ),
    (101, 'Granules are the smallest chunks of data read',      now() + 5,   3.14159 )
Query your new table
You can write a SELECT query just like you would with any SQL database:
SELECT *
FROM my_first_table
ORDER BY timestamp
Notice the response comes back in a nice table format:
┌─user_id─┬─message────────────────────────────────────────────┬───────────timestamp─┬──metric─┐
│     102 │ Insert a lot of rows per batch                     │ 2022-03-21 00:00:00 │ 1.41421 │
│     102 │ Sort your data based on your commonly-used queries │ 2022-03-22 00:00:00 │   2.718 │
│     101 │ Hello, ClickHouse!                                 │ 2022-03-22 14:04:09 │      -1 │
│     101 │ Granules are the smallest chunks of data read      │ 2022-03-22 14:04:14 │ 3.14159 │
└─────────┴────────────────────────────────────────────────────┴─────────────────────┴─────────┘
4 rows in set. Elapsed: 0.008 sec.
Insert your own data
The next step is to get your own data into ClickHouse. We have lots of table functions and integrations for ingesting data. We have some examples in the tabs below, or you can check out our Integrations page for a long list of technologies that integrate with ClickHouse.
- S3
- GCS
- Web
- Local
- PostgreSQL
- MySQL
- ODBC/JDBC
- Message Queues
- Data Lakes
- Other
Use the s3 table function to read files from S3. It's a table function - meaning that the result is a table that can be:
- used as the source of a
SELECTquery (allowing you to run ad-hoc queries and leave your data in S3), or... - insert the resulting table into a
MergeTreetable (when you are ready to move your data into ClickHouse)
An ad-hoc query looks like:
SELECT
   passenger_count,
   avg(toFloat32(total_amount))
FROM s3(
    'https://datasets-documentation.s3.eu-west-3.amazonaws.com/nyc-taxi/trips_0.gz',
    'TabSeparatedWithNames'
)
GROUP BY passenger_count
ORDER BY passenger_count;
Moving the data into a ClickHouse table looks like the following, where nyc_taxi is a MergeTree table:
INSERT INTO nyc_taxi
   SELECT * FROM s3(
    'https://datasets-documentation.s3.eu-west-3.amazonaws.com/nyc-taxi/trips_0.gz',
    'TabSeparatedWithNames'
)
SETTINGS input_format_allow_errors_num=25000;
View our collection of AWS S3 documentation pages for lots more details and examples of using S3 with ClickHouse.
Next steps
- Check out our Core Concepts section to learn some of the fundamentals of how ClickHouse works under the hood.
- Check out the Advanced Tutorial which takes a much deeper dive into the key concepts and capabilities of ClickHouse.
- Continue your learning by taking our free on-demand training courses at the ClickHouse Academy.
- We have a list of example datasets with instructions on how to insert them.
- If your data is coming from an external source, view our collection of integration guides for connecting to message queues, databases, pipelines and more.
- If you are using a UI/BI visualization tool, view the user guides for connecting a UI to ClickHouse.
- The user guide on primary keys is everything you need to know about primary keys and how to define them.