How to connect BuildShip to your Firebase Project?
BuildShip provides pre-defined nodes for Firestore integration, making it easy to interact with Firebase services within your workflows.
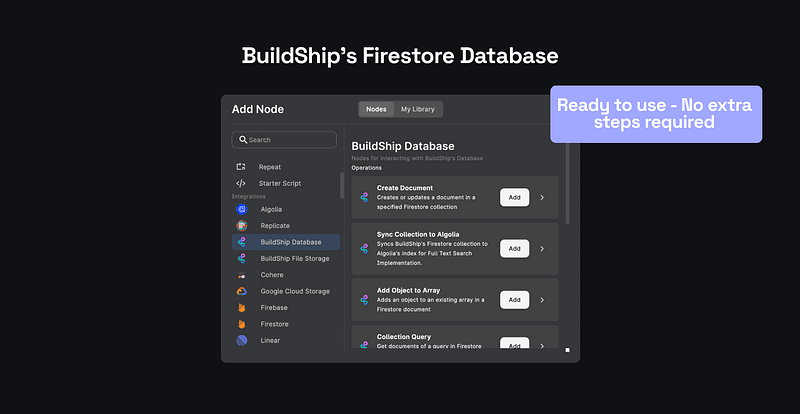
BuildShip provides pre-defined nodes for Firestore integration, making it easy to interact with Firebase services within your workflows.
BuildShip offers two options for interacting with Firebase:
- Using BuildShip’s built-in Firestore database
- Connecting to your own Firebase project
Option 1: Using BuildShip’s Built-in Firestore Database
BuildShip comes equipped with a built-in Firestore database that is automatically associated with your BuildShip project.
- No Additional Setup: Everything is pre-configured and ready for immediate use.
- Easy Access: Users can directly access and interact with the Firestore database through BuildShip.
- Full Functionality: You can perform all CRUD (Create, Read, Update, Delete) operations and more, making it a comprehensive solution for your Firebase integration needs.
🚀
Use the BuildShip Tables to visualize and manage your BuildShip Firestore data in a Spreadsheet UI. (This feature is only available for users on the Pro and Expert plan.) Learn more about BuildShip Tables.
Using BuildShip Database nodes
In the Node Explorer, navigate to the “BuildShip Database” category. You’ll find a range of nodes for various Firestore operations. Insert the relevant Firestore integration nodes into your workflow. Customize the nodes by providing the necessary input parameters for your specific use case.
You do not need to provide any additional information, like the Project ID parameter to use the BuildShip Database nodes. You can directly use the nodes to interact with your Firestore database.Option 2: Connecting to Your Own Firebase Project
Users can connect their Firebase projects by providing the Project ID and setting up permissions for the BuildShip Runtime Service Account.
Steps to set up your own Firebase Connection:
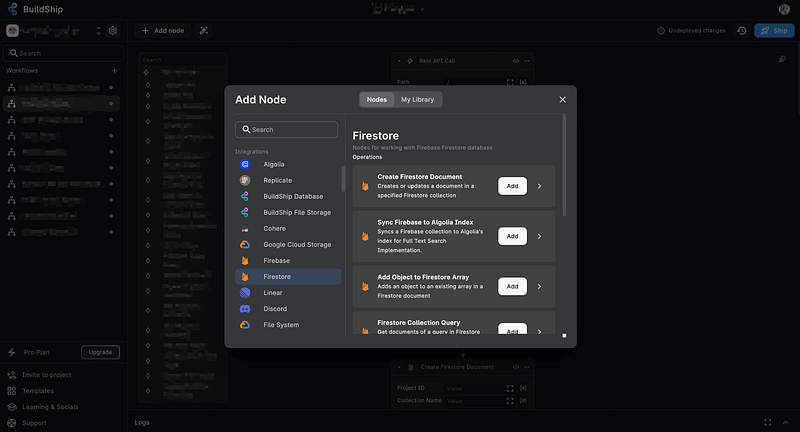
Insert any Firebase Integration Node
From the Node Explorer, insert any Firestore integration node into your workflow. Add the required fields to the node and add the Project ID of your Firebase project to which you want to add the data.
Access BuildShip Settings
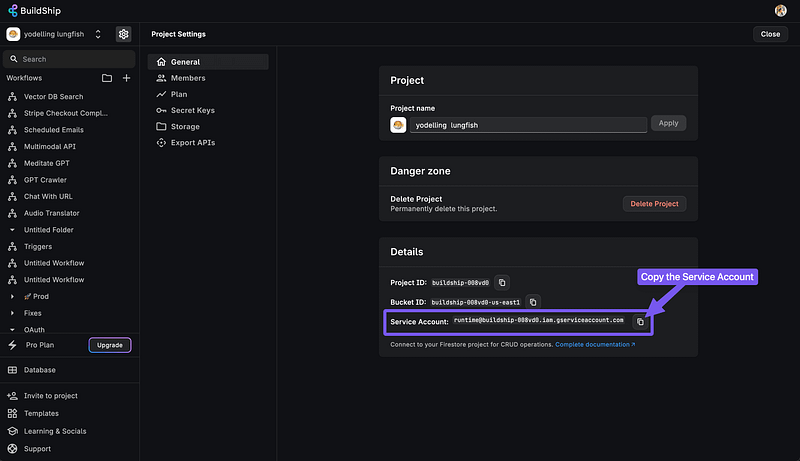
Navigate to the Settings section, found in the top-left corner of your dashboard, next to the Project Name.
Under the General tab in BuildShip Settings, you will find information about the underlying Firebase Project ID and Service Account details. Copy the Service Account details as we need this to grant access to your Firebase project.
Grant Access in Firebase IAM & Admin
- Open a new browser tab or window and go to your Firebase Project’s Google Cloud Platform (GCP) Console(opens in a new tab).
- ⚠️
- Make sure you are logged in to the correct Google account that has access to the Firebase project you want to connect to BuildShip. Also, make sure you’ve selected the correct Firebase project in the GCP Console.
- Navigate to the IAM & Admin section from the Firebase project’s GCP Console.
- Click on the Grant Access button to add a new principal.
- Paste the Service Account details you copied from BuildShip into the “New Principal” field.
- Assign the role of
Cloud Datastore UserandFirebase Admin SDK Administrator Service Agentto the Service Account. - Hit the Save button to grant access to the Service Account.
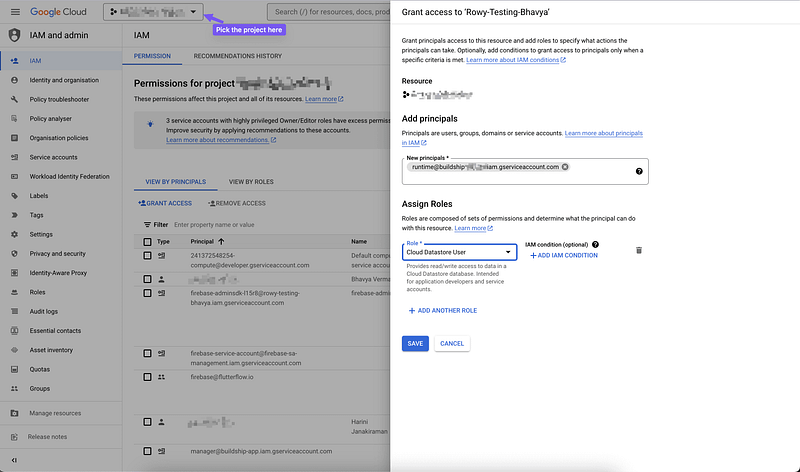
This will allow BuildShip to interact with your Firebase resources.
💡
Please note that GCP takes time (approx 2 to ~7 minutes or more in extreme cases) for access changes through the system. For more info refer to this documentation here(opens in a new tab).
