Postgres Integration with BuildShip
BuildShip offers a seamless integration with PostgreSQL using BuildShip’s pre-built Postgres Integration nodes, enabling you to perform…
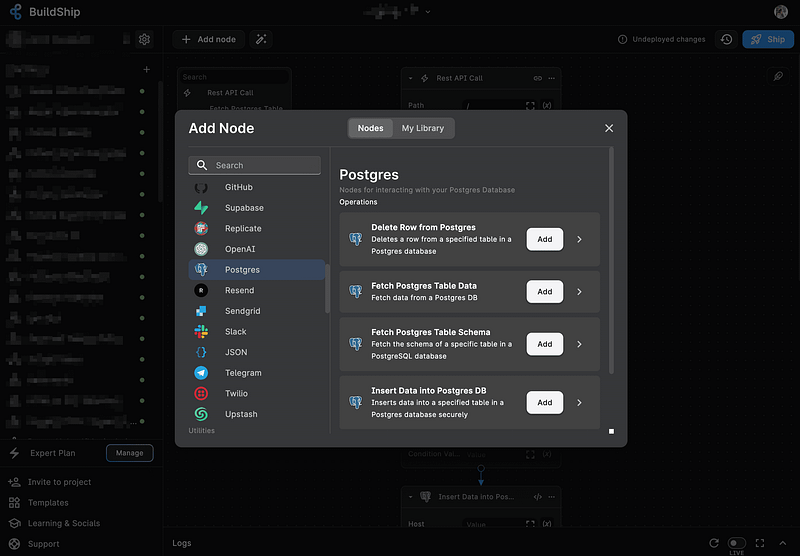
BuildShip offers a seamless integration with PostgreSQL using BuildShip’s pre-built Postgres Integration nodes, enabling you to perform Create, Read, Update, and Delete (CRUD) operations on your database effortlessly.
You can find the Postgres Integration nodes under the Integrations section of the node explorer.
Prerequisites ✅
Before you get started with integrating PostgreSQL into BuildShip, ensure you have the following:
PostgreSQL Database
You should have access to a PostgreSQL database. If you don’t have one, you can set it up easily. You can host your PostgreSQL database using various providers and methods, including:
- Self-Hosted: You may have a self-hosted PostgreSQL database on your own server or infrastructure.
- Cloud-Based: PostgreSQL can be hosted on cloud platforms like AWS RDS, Google Cloud SQL, or Azure Database for PostgreSQL.
- Serverless: Consider using a serverless PostgreSQL service like NEON(opens in a new tab) (which is used in this tutorial as an example) for a hassle-free and scalable database setup.
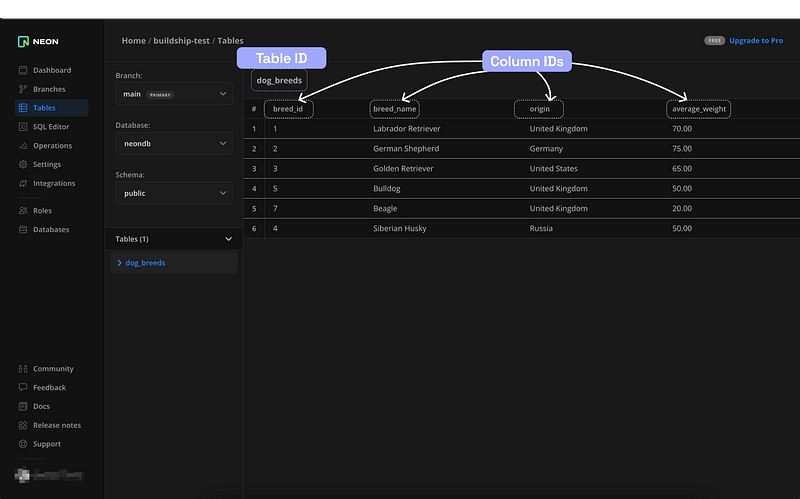
Connection String Parameters
Retrieve the connection string parameters for your PostgreSQL database. You’ll need the following:
- Host: The host of your PostgreSQL database.
- Database Name: The name of your PostgreSQL database.
- User: The username to access your PostgreSQL database.
- Password: The password associated with the user.
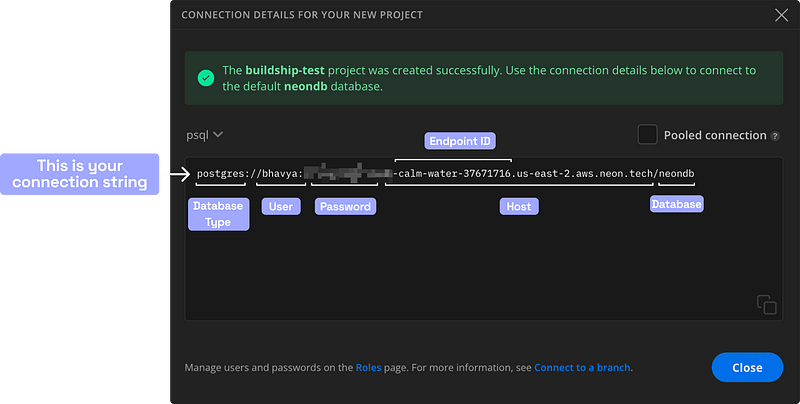
Let’s walk through with an example of how you can use these nodes to perform CRUD operations on your PostgreSQL database. In this example, we’ll be using a PostgreSQL database hosted on NEON(opens in a new tab). On BuildShip, we can begin with a new workflow with any Trigger of your preference. In this example, we’ll be using a REST API Trigger.
Fetching Table Schema
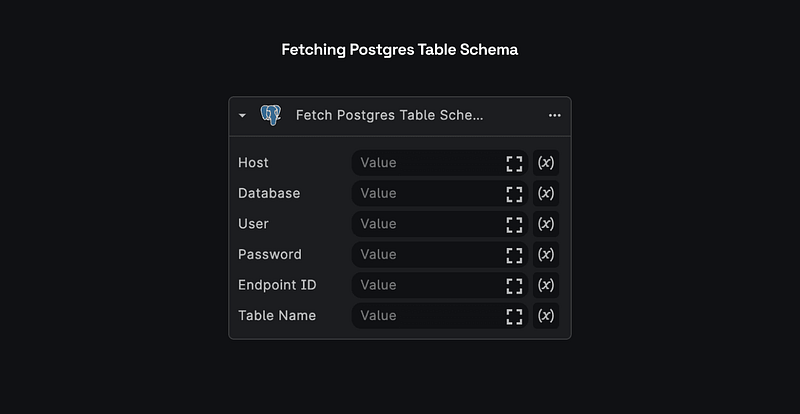
To fetch the schema of a table in your PostgreSQL database, you can use the Fetch Postgres Table Schema node. Open the Node Explorer, under the Integrations section, select the Postgres category, and select the Fetch Postgres Table Schema node to be added to the workflow.
Add in your PostgreSQL database’s connection string parameters and the table name as input. You can also open the Node Editor (by clicking on the </> icon) to test and modify the existing node.
💡
Using Secrets to store passwords
It’s always a good practice to use the Secrets to store your database’s connection string password or other sensitive data. You can then use the Secrets node to retrieve the values of the secrets and use them as inputs for the Postgres Integration nodes. Learn more about using Secrets in BuildShip.
Sample Output:

[ { "column_name": "breed_id", "data_type": "integer", "character_maximum_length": null }, { "column_name": "breed_name", "data_type": "character varying", "character_maximum_length": 100 }, { "column_name": "origin", "data_type": "character varying", "character_maximum_length": 100 }, { "column_name": "average_weight", "data_type": "numeric", "character_maximum_length": null }]Fetching Table Data
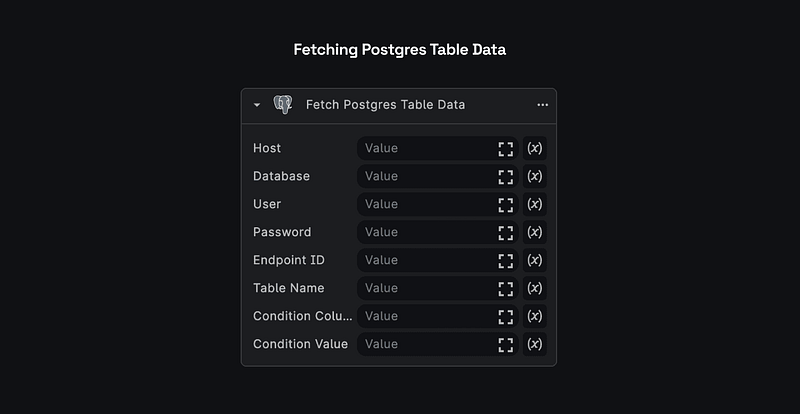
To fetch the data of a table in your PostgreSQL database, you can use the Fetch Postgres Table Data node from the Node Explorer. You can also use a parameterized query to fetch data based on a condition. The Condition Column and Condition Value inputs are optional. If you don’t provide these inputs, the node will fetch all the data from the table.
Add in your PostgreSQL database’s connection string parameters and the table name as input. Test and modify the node via the Node Editor (by clicking on the </> icon).
Let’s say we need to fetch the data for the breed_name Doberman Pinscher from the dog_breeds table. We'll add the conditionColumn as breed_name and conditionValue as Doberman Pinscher.
Example Output:
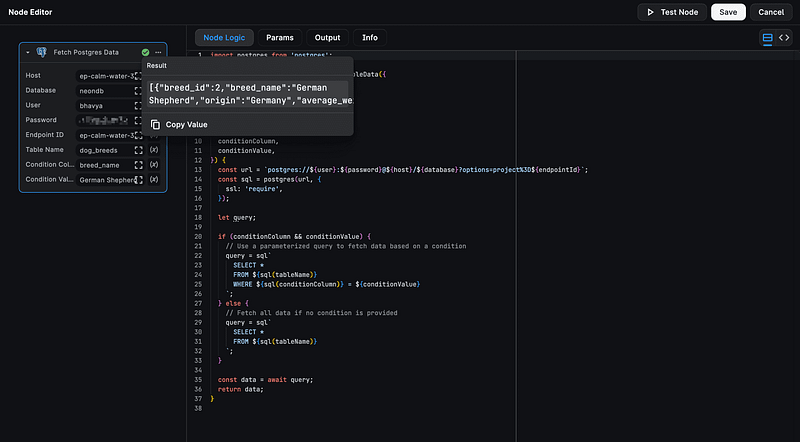
[ { "breed_id": 2, "breed_name": "German Shepherd", "origin": "Germany", "average_weight": "75.00" }]Inserting Data
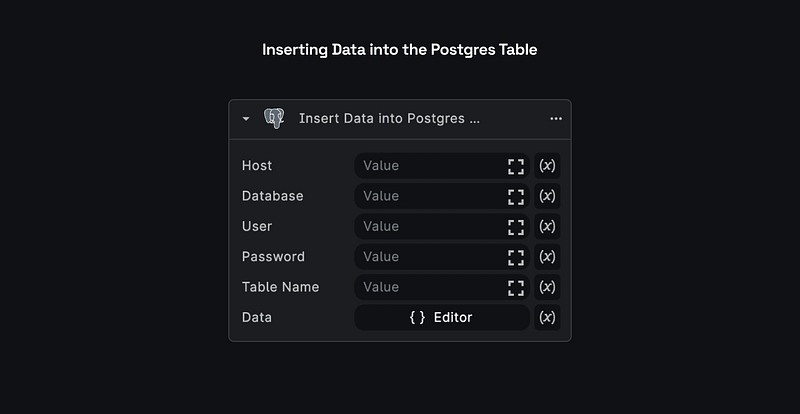
To insert data into a table in your PostgreSQL database, you can use the Insert Data into Postgres DB node from the Node Explorer.
Let’s say we need to insert a new row into the dog_breeds table with the following data:
[ { "breed_id": 8, "breed_name": "Doberman Pinscher", "origin": "Germany", "average_weight": 75 }, { "breed_id": 9, "breed_name": "Shih Tzu", "origin": "Tibet", "average_weight": 12 }]Add in your PostgreSQL database’s connection string parameters and the table name as input. Test and modify the node via the Node Editor (by clicking on the </> icon).
Output:
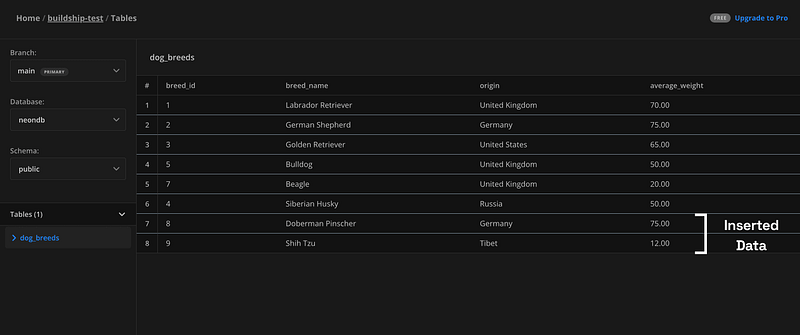
Updating Data
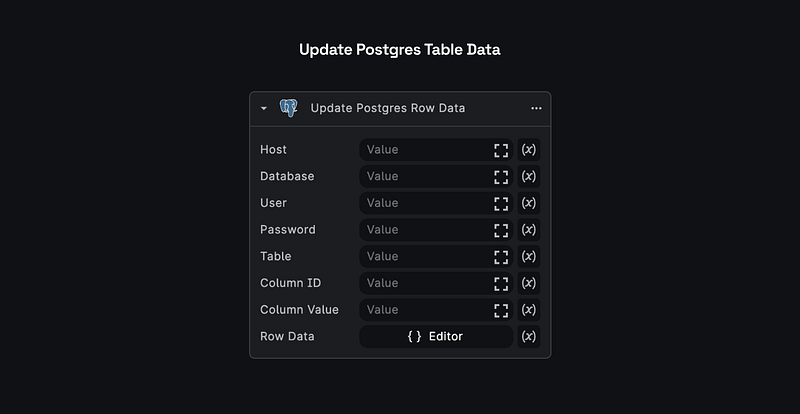
To update data in a table in your PostgreSQL database, you can use the Update Postgres Row Data node from the Node Explorer.
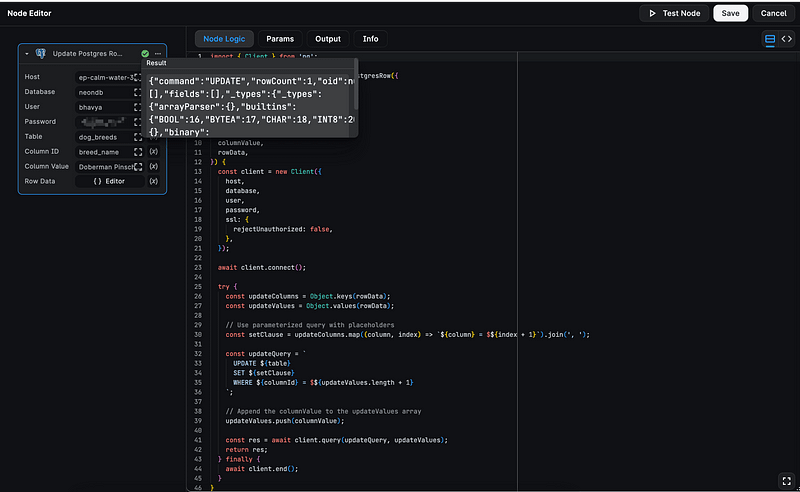
Let’s say we need to update the average_weight of the Doberman Pinscher breed to 80 in the dog_breeds table.
Add in your PostgreSQL database’s connection string parameters and the table name as input. The Column ID and Column Value let’s you filter the row to be updated.
Let’s add the columnId as breed_name and columnValue as Doberman Pinscher. For the data to be updated, we'll add the following JSON in the Data input:
{ "average_weight": 80}Output:

Deleting Data

To delete data from a table in your PostgreSQL database, you can use the Delete Row from Postgres node from the Node Explorer.
Let’s say we need to delete the dog breed which is originated from Tibet from the dog_breeds table.
Add in your PostgreSQL database’s connection string parameters and the table name as input. The Column ID and Column Value let’s you filter the row to be deleted.
Add the columnId as origin and columnValue as Tibet.